If you get bored with LCD, or your project requires a color display, it’s time for a TFT display! Here you will learn how to properly connect a small, inexpensive SPI display to your Arduino and display something on it. Note: This little tutorial follows as far as possible this …
Read More
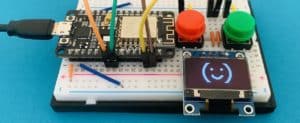
In this project you create a kind of intercom. However, this is not limited to one single building, but can send messages from home to your smartphone – and also receive messages from there and display them on an OLED display. In practice, the project consists of two buttons that …
Read More
Who reads data from sensors all day long deserves a round of gambling in the evening! 🙂 For this little Arduino Jump’n’Run you only need a few components (and some wires). You create it in a few minutes and can start right away. The idea and the code for this …
Read More
In this project you create an Arduino Countdown, which starts a timer at the push of a button and counts down the seconds on a display. A 7-segment display and the fact that you do not boil your egg in 7 minutes, for example, but in 420 seconds gives you …
Read More
Have you ever left your apartment and then stood on the street in the rain? With this project you will make sure that this does not happen again. With an ESP8266, you retrieve the current weather situation via an API and show on an OLED display whether it is raining, …
Read More
With this ISS Tracker you always know when you can observe the International Space Station in the sky: An OLED display shows the time and duration of the next pass, and as soon as the ISS rises above the horizon, an LED signals that it is time to observe. The …
Read More
How about if your LEGO ISS lights up as soon as the real International Space Station flies over it? In this project, you make that happen. You will learn how to find out the time of the next flyover so that you can program a countdown and then light up …
Read More
Letters and numbers are too boring for you? Then bring your own characters to the LCD display*! With the library LiquidCrystal this is no problem. Suppose you want to display a heart. For this you first define your character: Each “field” on your LCD display has 8 rows of 5 …
Read More
Connecting an LCD display* to the Arduino is not difficult – even if it requires a whole bunch of cables. In this article, you’ll learn where these cables go, how to control the display, and how to make characters appear on it. Let’s take a look at the pins of …
Read More
You can use your Arduino (or ESP8266, ESP32, etc.) to display not only text but also images on a monochrome OLED display. However, you can’t just put an image file such as a JPEG there. It’s a bit more complex, but with the right tools it’s still no problem. Basic …
Read More
In this tutorial you will learn how to connect and use the Adafruit NeoPixel RGB LED ring (or a compatible ring)*to your Arduino. The ring is available with different numbers of LEDs, we use a 12 LED ring here. The special thing about the NeoPixel is that you can control …
Read More
There are a lot of displays for the Arduino, but none of them has such an old-school factor as the 7-segment display. Back To The Future? Here you go! In this tutorial you will learn how to connect this display and show numbers on it. We use a MAX7219 display …
Read More
Learn how to connect, control and use different displays (LCD, TFT & OLED) on your Arduino, ESP8266 or ESP32.
Many displays – even more possibilities
There are a lot of displays you can connect to your Arduino, ESP8266 or ESP32. The most famous is the 16×2 LCD – notorious for the amount of wires you have to use to connect it (unless it has an I2C interface). But small TFT and OLED versions are also very suitable. Exotic, but with a certain retro charm, are 7-segment displays. These are a bit trickier to use, but all the more unusual for it.
The good thing is that there are already libraries for all these displays, which you can easily install in your Arduino IDE. With the help of these libraries and the right instructions, it won’t be difficult for you to control and use your favorite display.