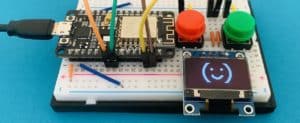
In this project, you will use an ESP8266 to set up a Dash button that sends a message to your Telegram account at the touch of a button. You can receive this message anywhere on your smartphone – as long as you have Internet access.
Beginner
1 – 2 hours
ca. $10
For this project you need (quantities see description):
Prepare Telegram
First you need an account with Telegram – and the corresponding app for your smartphone or computer. In the following we use a Smartphone. Telegram is free, ad-free, and works much like WhatsApp. However, here you have the possibility to create bots that you can interact with.
You can take advantage of that in this project by letting your ESP8266 “talk” to your Telegram bot. The bot in turn will immediately send you a notification.
Create a Telegram bot
Download Telegram from the Play Store or App Store to your smartphone – if you haven’t already done so. Create an account there and then search for
Open the Botfather and tap Start. After his welcome you will receive instructions. You can read it now or tap on
After you have assigned the names, you will receive a message with your token. You will need this token later in your sketch to connect your ESP8266 to your Telegram bot.
Get your User ID
You have now created a Telegram bot. Now you only need your User ID to send messages to the bot. This also takes only a few seconds.
In the Telegram app go back to the Chats and search for IDBot:
Now tap on IDBot and in the following chat window tap on /getid. You will immediately receive a message with your User ID:
And these were already the preparations in Telegram. Keep your token and your User ID ready to enter them into the sketch later. And above all, keep it secret so that no one else uses your bot.
Setting up the project
It takes only a few minutes to set up on your breadboard. Just orientate yourself by this schematic:
The button is connected to the ESP8266 via a pull-down resistor so that it sends a stable 0 to your microcontroller as long as you don’t press it. Only when this is the case will your ESP8266 receive a signal and send a message to your Telegram bot.
Once the message has been sent, the LED will light up briefly.
The sketch for the Dash button
Now it is time for some code. If you have never used an ESP8266 with the Arduino IDE:
The required libraries
For your Dash button you need three libraries. Two of them should already be pre-installed on your computer:
The library UniversalTelegramBot.h handles the communication with your Telegram bot. You can find it in the Library Manager of the Arduino IDE – but it might be outdated. Therefore we recommend you to
Then you need to include this library in your sketch by selecting Sketch > Include Library > Add .ZIP Library from the Arduino IDE Sketch menu and selecting the ZIP file you just downloaded.
Now copy the following sketch, load it onto your ESP8266 and try the alarm right away!
Note: Before your Telegram bot can receive messages, you must first open it and tap Start. You only have to do this once at the beginning.
/*
Dash Button with Telegram and an ESP8266 - polluxlabs.net
*/
#include <ESP8266WiFi.h>
#include <WiFiClientSecure.h>
#include <UniversalTelegramBot.h>
//Your WiFi Credentials
const char* ssid = "NETWORK";
const char* password = "PASSWORD";
//Initialize Telegram-Bot
#define botToken "DEIN TOKEN" //Bot-Token from Botfather)
//Your User ID
#define userID "USER ID"
WiFiClientSecure client;
UniversalTelegramBot bot(botToken, client);
//State of Button
int switchState = 0;
void setup() {
Serial.begin(115200);
client.setInsecure();
// Verwendete Pins
pinMode(13, INPUT); //Button
pinMode(15, OUTPUT); //LED
//Connect to WiFi
Serial.print("Connecting to: ");
Serial.println(ssid);
WiFi.mode(WIFI_STA);
WiFi.begin(ssid, password);
while (WiFi.status() != WL_CONNECTED) {
Serial.print(".");
delay(500);
}
Serial.println("");
Serial.println("Connected!");
bot.sendMessage(userID, "Bot started", "");
}
void loop() {
switchState = digitalRead(13);
Serial.println(switchState);
if (switchState) {
bot.sendMessage(userID, "Button!", "");
digitalWrite(15, HIGH);
delay(200);
digitalWrite(15, LOW);
delay(200);
digitalWrite(15, HIGH);
delay(200);
digitalWrite(15, LOW);
}
}
Now let’s have a closer look at some important parts of the sketch.
First there are some data that you have to replace with your own: Your Wi-Fi access data as well as your token and User ID from Telgram. Enter these data here:
const char* ssid = "NETWORK";
const char* password = "PASSWORD";
#define botToken "TOKEN"
#define userID "USER ID"
Then you create an instance of WiFiClientSecure names clientand also a botwith your botToken and client defined above.
WiFiClientSecure client;
UniversalTelegramBot bot(botToken, client);
In the setup of the sketch you define the two pins you use. The 13 stands for pin D7 on ESP8266 and the 15 for pin D8.
pinMode(13, INPUT); //Button
pinMode(15, OUTPUT); //LED
Finally, you start the connection to the Internet. Once connected, your sketch will send a message telling you that the bot has been started.
In the Loop your sketch is now waiting for you to push the button. As soon as this is the case, the function
switchState = digitalRead(13);
if (switchState) {
bot.sendMessage(userID, "Button!", "");
digitalWrite(15, HIGH);
delay(200);
digitalWrite(15, LOW);
delay(200);
digitalWrite(15, HIGH);
delay(200);
digitalWrite(15, LOW);
}
The message you want to send can of course be defined in the function bot.sendMessage().
What’s next?
You now have a Dash button that can send messages to your Telegram bot. A similar project could be e.g. a temperature sensor that sends a warning message to your smartphone at a preset temperature.
On Pollux Labs we have many tutorials and projects, which deal with temperature and other sensors.
Have fun exploring! 🙂
Letzte Aktualisierung am 2021-01-09 / Affiliate Links / Bilder von der Amazon Product Advertising API